Roto F Ceiling Fan Halogen Light Bulb Replacement: A Complete Guide for Safe and Easy Installation
A ceiling fan with built-in lighting is one of the most practical additions to any home. It improves air circulation while also providing illumination for bedrooms, living rooms, dining spaces, and offices. However, when the light stops working, many homeowners become confused about the correct replacement process. That is why understanding roto f ceiling fan halogen light bulb replacement is important for maintaining both the performance and appearance of your ceiling fan.
Halogen bulbs have been popular for years because they provide bright, warm lighting and work well with decorative fan fixtures. Over time, though, these bulbs burn out and require replacement. Some users struggle with removing the old bulb, identifying the correct wattage, or safely handling the replacement process. Fortunately, replacing a halogen bulb in a Roto F ceiling fan is usually simple when you follow the correct steps.
The process involves turning off the power, allowing the bulb to cool, removing the protective cover if necessary, selecting a compatible halogen bulb, and carefully installing the replacement. Although this sounds straightforward, there are several important details homeowners should know to avoid damaging the fan or reducing bulb lifespan.
In this complete guide, you will learn everything related to roto f ceiling fan halogen light bulb replacement including bulb compatibility, safety precautions, common problems, maintenance tips, troubleshooting advice, and possible upgrades to energy-efficient lighting solutions.
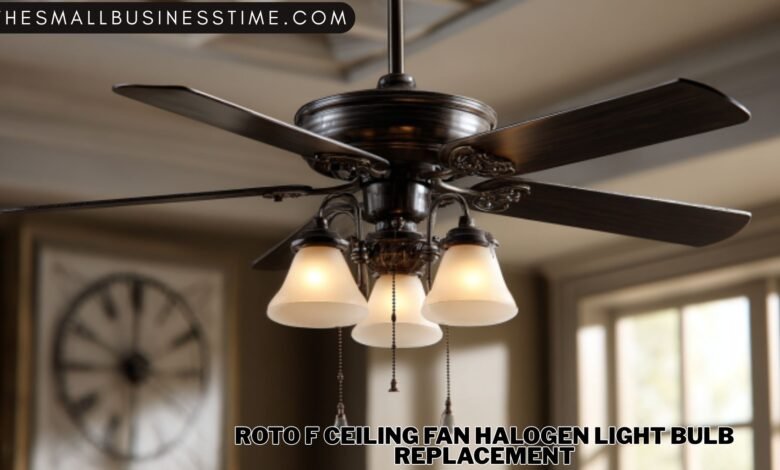
Understanding Roto F Ceiling Fan Lighting Systems
Before beginning a roto f ceiling fan halogen light bulb replacement, it helps to understand how the lighting system works. Most ceiling fans with halogen lighting use compact bulbs installed inside decorative glass fixtures. These bulbs may vary in size, shape, wattage, and connector type depending on the fan model.
Halogen bulbs are designed to produce brighter light than traditional incandescent bulbs while maintaining a warm glow. They operate at high temperatures and use a tungsten filament enclosed in halogen gas. This design improves brightness and efficiency but also means the bulbs become extremely hot during operation.
Many Roto F ceiling fans use small capsule-style halogen bulbs or mini-can halogen bulbs. Some are protected behind a glass dome or decorative cover. Others are accessible directly from beneath the fan housing. Understanding your specific setup makes the replacement process easier and safer.
Another important aspect is wattage compatibility. Installing a bulb with higher wattage than recommended can overheat the fixture and potentially damage the fan’s electrical components. Always check the manufacturer recommendations printed near the bulb socket or inside the fixture cover.
Signs You Need a Roto F Ceiling Fan Halogen Light Bulb Replacement
Sometimes homeowners assume the ceiling fan fixture is broken when only the bulb has failed. Recognizing the signs of a burnt-out halogen bulb can save time and money.
One of the most obvious signs is complete loss of light while the fan itself still operates normally. If the blades spin but the light does not turn on, the bulb may simply need replacement.
Another common symptom is flickering light. Halogen bulbs often flicker near the end of their lifespan. Intermittent dimming or flashing can indicate the filament is weakening.
A buzzing sound from the bulb area may also suggest the halogen bulb is failing. In some cases, excessive heat buildup causes premature wear and unstable lighting performance.

Darkened or cloudy bulb glass is another warning sign. Over time, halogen bulbs may develop black residue inside the glass due to filament degradation.
If you notice any of these issues, performing a roto f ceiling fan halogen light bulb replacement is usually the first and easiest solution.
Safety Precautions Before Replacing the Halogen Bulb
Safety should always come first during any electrical maintenance task. Halogen bulbs operate at very high temperatures, so proper precautions are essential.
The first step is turning off the ceiling fan completely. Use the wall switch and, if possible, switch off power at the circuit breaker for extra protection.
Never attempt a roto f ceiling fan halogen light bulb replacement immediately after using the light. Halogen bulbs remain extremely hot even after being turned off. Allow at least fifteen to twenty minutes for cooling.
Use a stable ladder or step stool positioned securely beneath the fan. Avoid standing on unstable furniture or uneven surfaces.
Another important precaution is avoiding direct skin contact with the new halogen bulb. Oils from human skin can create hot spots on the bulb surface, reducing lifespan and potentially causing cracking. Use gloves or hold the bulb with a clean cloth or tissue.
Work in a well-lit environment whenever possible. Good visibility helps prevent accidents and ensures proper bulb installation.
Tools Needed for Roto F Ceiling Fan Halogen Light Bulb Replacement
One reason homeowners appreciate this task is that it requires very few tools. In most cases, you only need basic household items.
A sturdy ladder is essential for safe access to the ceiling fan. You may also need a screwdriver if the fixture cover is secured with screws.
Soft gloves or a clean microfiber cloth help prevent direct contact with the new halogen bulb. This small precaution can significantly extend bulb life.
Some fixtures have twist-lock glass covers that require gentle rotation rather than tools. Others may include decorative clips or retaining rings. Having a small container nearby for screws and clips can help prevent losing parts during the replacement process.
Finally, keep the replacement halogen bulb ready before beginning the job. Verify the correct wattage and bulb type to avoid installation issues later.
Step-by-Step Roto F Ceiling Fan Halogen Light Bulb Replacement Process
The actual replacement process becomes easy when broken into clear steps.
First, turn off power to the fan and allow the bulb to cool completely. Position the ladder securely beneath the fan fixture.
Next, remove the glass cover or light shade if your model includes one. Some covers twist counterclockwise while others are held by screws or clips. Handle glass carefully to avoid cracking or dropping it.
Once the bulb is visible, gently remove the old halogen bulb. Depending on the bulb style, this may involve pulling straight out, twisting slightly, or carefully releasing small retaining pins.
Inspect the socket for dust, discoloration, or signs of heat damage. If everything appears normal, insert the new bulb using gloves or a cloth.
Ensure the bulb fits securely without forcing it into place. Improper installation can damage the socket or create electrical contact issues.
Reattach the glass cover or decorative fixture securely. Restore power and test the light switch.

If the new bulb illuminates properly, your roto f ceiling fan halogen light bulb replacement has been completed successfully.
Choosing the Correct Halogen Replacement Bulb
Selecting the correct replacement bulb is one of the most important parts of the process. Using the wrong bulb can reduce performance or even create safety hazards.
Always match the bulb base type exactly. Common halogen bulb bases include G9, GU10, and mini-candelabra styles. The old bulb usually contains identifying information printed on its surface.
Wattage is equally important. If the original bulb was 50 watts, replacing it with a significantly higher wattage bulb may overload the fixture.
Brightness level should also match your lighting needs. Some homeowners prefer softer ambient lighting while others want maximum brightness for functional spaces.
Color temperature affects the room atmosphere. Warm white halogen bulbs create a cozy appearance, while cooler bulbs produce brighter, cleaner lighting.
When purchasing replacements, many users now choose compatible LED alternatives instead of traditional halogen bulbs. LED replacements offer lower energy consumption, reduced heat, and longer lifespan while maintaining similar brightness.
Common Problems During Bulb Replacement
Although most replacements are simple, certain problems may occur during the process.
One common issue is a stuck bulb. Heat can sometimes cause the bulb base to become difficult to remove. In such cases, gentle wiggling while applying light pressure usually helps.
Another problem is a broken bulb. If the glass breaks during removal, ensure power remains off before carefully removing remaining fragments with needle-nose pliers.
Some homeowners install a new bulb only to discover the light still does not work. This may indicate a faulty socket, loose wiring, blown fuse, or malfunctioning light kit rather than a burnt-out bulb.
Flickering after replacement can occur if the bulb is not seated properly. Reinstalling the bulb securely often solves the issue.
Occasionally, dimmer switches create compatibility problems with certain halogen or LED replacement bulbs. Using compatible dimmable bulbs usually resolves this situation.
Benefits of Upgrading from Halogen to LED
Many people performing a roto f ceiling fan halogen light bulb replacement eventually consider upgrading to LED technology. This transition offers several advantages.
LED bulbs consume significantly less electricity than halogen bulbs. Over time, this reduces household energy costs.
Another major benefit is lower heat production. Halogen bulbs generate substantial heat, making fixtures hot to the touch. LEDs remain much cooler and improve overall safety.
Longer lifespan is another reason homeowners switch to LEDs. A quality LED bulb may last many years before needing replacement, reducing maintenance frequency.
LED bulbs are also available in multiple brightness and color temperature options. This flexibility allows homeowners to customize room ambiance more effectively.

Environmental impact is another factor. Reduced energy consumption contributes to lower overall electricity demand and greater sustainability.
Although LED bulbs may cost more initially, the long-term savings often make them a worthwhile investment.
Maintenance Tips for Ceiling Fan Lighting Systems
Proper maintenance helps extend the life of both the fan and its lighting components.
Dust accumulation is one of the biggest issues affecting ceiling fan performance. Regularly cleaning the fixture and bulb area improves airflow and reduces overheating.
Avoid exceeding recommended bulb wattage. Overpowered bulbs create unnecessary heat stress inside the fixture.
Inspect glass covers periodically for cracks or looseness. Damaged covers can become dangerous if left unattended.
If your fan includes dimming features, use compatible bulbs specifically designed for dimmer operation.
Check for loose screws or vibrating parts during routine cleaning. Excessive vibration can shorten bulb lifespan and damage electrical connections.
Replacing bulbs promptly when they begin flickering also helps prevent additional electrical strain on the lighting system.
Troubleshooting After Replacement
Sometimes the light still fails after installing a new bulb. Several troubleshooting steps can help identify the cause.
First, verify the bulb is inserted correctly. Loose connections are among the most common issues.
Next, test the wall switch and pull chain controls. Some ceiling fans have separate controls for light and fan functions.
If the fan works but the light does not, inspect the socket for signs of burn marks or corrosion.
Circuit breaker issues may also affect lighting operation. Check whether the breaker has tripped.
In older fans, internal wiring connections can loosen over time due to vibration. If basic troubleshooting does not solve the problem, consulting a qualified electrician may be necessary.
Do not continue forcing bulbs into damaged sockets, as this can worsen electrical problems and create fire hazards.
Why Halogen Bulbs Burn Out Quickly
Many homeowners notice that halogen bulbs sometimes fail sooner than expected. Several factors contribute to reduced bulb lifespan.
Frequent on-and-off cycling creates stress on the filament. Rooms where lights are switched repeatedly throughout the day may experience faster burnout.
Excessive vibration from unbalanced ceiling fan blades can also damage delicate filaments inside halogen bulbs.
Improper handling during installation is another major cause. Finger oils create uneven heating that weakens the bulb surface over time.
Poor ventilation inside enclosed fixtures may trap heat and accelerate wear.
Voltage fluctuations within the home electrical system can additionally shorten bulb life. Sudden power surges place stress on halogen filaments.
Using high-quality bulbs and following correct installation practices helps reduce premature failures significantly.
Decorative and Functional Lighting Considerations
Lighting affects more than visibility alone. The type of bulb you choose influences the overall appearance and comfort of your room.
Warm halogen lighting creates a relaxing environment suitable for bedrooms and living areas. Bright white lighting works better for kitchens and workspaces.
Some homeowners use dimmable halogen bulbs for adjustable mood lighting. This flexibility allows the same room to serve multiple purposes throughout the day.
Decorative glass shades also influence light distribution. Frosted glass softens brightness, while clear glass maximizes illumination.
When performing a roto f ceiling fan halogen light bulb replacement, consider whether your current lighting setup still meets your needs. Sometimes a simple bulb upgrade can improve both efficiency and room atmosphere dramatically.
Final Thoughts on Roto F Ceiling Fan Halogen Light Bulb Replacement
Understanding the correct roto f ceiling fan halogen light bulb replacement process makes home maintenance easier and safer. While replacing a bulb may seem like a minor task, proper handling, correct bulb selection, and attention to safety precautions are extremely important.
Halogen bulbs continue to provide bright and attractive lighting for many ceiling fan models. However, homeowners now also have the option of upgrading to modern LED alternatives for improved efficiency and longer lifespan.
By following careful installation procedures, avoiding common mistakes, and maintaining the fixture regularly, you can keep your ceiling fan lighting system operating reliably for years. Whether you are replacing a burnt-out bulb for the first time or considering an energy-efficient upgrade, a well-maintained ceiling fan light enhances comfort, functionality, and style throughout your home.
A successful roto f ceiling fan halogen light bulb replacement not only restores illumination but also helps preserve the beauty and performance of your ceiling fan system.
Also Read: The Small Business Time


